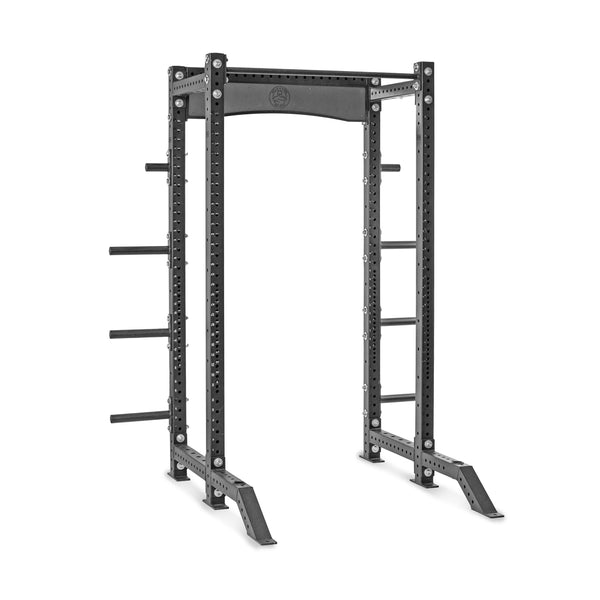
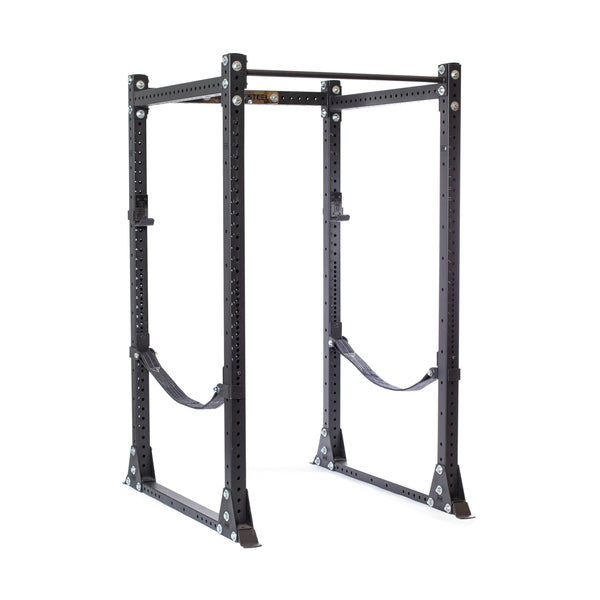
Squat stands are a great start to a growing home gym. For some lifters (here's looking at you, Oly enthusiasts!), a squat stand is enough to hit some goals and make some gainz. Other lifters eventually need to upgrade to a power rack to keep the gain train chugging along. 🚂
Thanks to the modularity and customization of the Hydra Series, you can upgrade your Hydra Squat Stand to a Flat Foot Rack with a few attachments and adjustments.
Read on to discover how to transform your Hydra Squat Stand into a Hydra Flat Foot, from what parts you need to common challenges and considerations. The Hydra Power Rack series is designed to be the last rack you'll ever need.
It has several amazing benefits that set it apart from the run-of-the-mill power rack:
- Durability - the burly 11-gauge steel tubing is practically bomb-proof. 💣
- Compatibility - the true 3″ x 3″ uprights and 5/8″ holes make the rack and attachments compatible with non-B.o.S. racks that use the same measurements.
- Versatility - there are over 15 compatible B.o.S. attachments, with more on the way.
- Customization - choose from 9 rack designs and add the attachments that suit your needs.
- Simplicity - alternatively, leave the customization to us with a Hydra Pre-Built rack.
- Modularity - upgrade or transform your rack at any time with crossmembers, uprights, and hardware.
Let's zoom in on the modularity of the Hydra series. These beastly machines are the Transformers of the home gym world. You can add and expand at any time with customizable modular parts. Add a couple of crossmembers, some batwing extensions, and make your own Frankenrack.
With the right parts, you can take a DIY (with help) approach to transforming your rack— and whether you choose your inner Autobot or Decepticon in the process is entirely your business.
Look, we can't make your life decisions for you; only you can decide whether you should upgrade your Squat Stand. If it's "good enough" for your needs, party on, but consider these signs that it might be time to upgrade:
- Changing training style - do you dream of rack pulls and replacing all the commercial gym machines from your old stomping grounds? Then it's time for a power rack.
- More space or budget - if you bought a Squat Stand as a "good enough" purchase for your space and budget, you may consider upgrading as those situations evolve.
- Attachment envy - it's true; we keep releasing amazing Hydra attachments. If you're running low on room and continuously have to swap attachments out, it's time to add a few more uprights.
- Storage needs - a clean gym is a happy gym. Creating space for functional storage will improve your safety, focus, and motivation. Check out all the Hydra storage options here.
Still confused about where you're at in your home gym journey? Check out From Basic to Beast Mode: When to Upgrade Your Hydra Squat Stand to a Power Rack.
A few quick notes before diving into the how-to portion of today's lesson: First, the DIY reconfiguration process isn't for everyone. If your goal is to save money by purchasing separate uprights rather than selling your Squat Stand and buying a Flat Foot rack, you'll likely be disappointed.
However, the disassembly and assembly process is pretty quick. Second, there are a few important incompatibilities to note when going through this process: If you have a 56" Squat Stand, you can only convert to a 30" or 24" Flat Foot Depth. The 43" crossmembers are incompatible. If you have a 62" Squat Stand, it can be paired with the 43", 30", or 24" Flat Foot depth. You can leave the back bottom crossmember on your Flat Foot Power Rack for extra stability.
However, its presence interferes with the Lat Pulldown attachment. If that attachment is on your wishlist, consider removing the back bottom crossmember. You know when you go to the grocery store without a list and end up with a bunch of stuff you don't need? We're here to help you stick to the bread, milk, and eggs of it all with a handy shopping list (but if you throw in a few extra attachments, we'll support your decision). You'll need:
- 1 pair of uprights - these must match your existing upright specs (i.e., if you have an 84" Squat Stand, get a pair of 84" uprights).
- 1 pair of crossmembers - choose 24", 30", or 43" crossmembers, depending on your desired depth. Remember, if you have 56" flat feet on your Squat Stand, you can only choose 24" or 30" crossmembers!
- 1 pull-up bar - if you got a pull-up bar with your Hydra Squat Stand, you're all set (unless you want to try a multi-grip or globe bar). If you don't have a Hydra pull-up bar, you'll need one to match your desired width (41" or 43").
- 1 back crosspiece - this must match your pull-up bar/ power rack width (41" or 43"). The lower crossmember on your Squat Stand will work. Alternatively, you can choose a second standard or double pull-up bar to replace the back crosspiece.
- 1 pair of safeties - choose from safety straps or pin pipe safeties that match the depth of your Flat Foot Power Rack. If you have depth-compatible Spotter Arms from your Squat Stand, these also work.
- 4 Flat Foot Reinforcement Plates - These are absolutely necessary, as they hold the crossmembers and uprights in place and stabilize the rack.
- 24mm Wrench - this is necessary for removing and tightening bolts. If you don't have one from your last Hydra adventure, you can get one here.
Don't feel like you have to stop there— you can also add a Hydra Rack Plate Extension on the back for the whole shebang. Note: Crossmembers come with hardware to connect both sides to the uprights. Uprights do not come with hardware.
So if you buy only uprights (we're not sure why you would, but who are we to question your creative process), you'd need your Hydra Hardware separately. Now it's time to get building. We recommend connecting and hand-tightening all the bolts, then going back and securing them with a wrench or impact gun. This approach provides stability as you build without the frustration of realizing you need to move something.
We also recommend having a friend help, especially with the overhead connection bits. You know that friend who moves all the time and always asks you to help move his couch? Pick that guy.
Ready? Here we go:
- If your Squat Stand has a pull-up bar, unbolt and remove it.
- Unbolt and remove the uprights and Flat Foot Reinforcement Plates (AKA: brackets).
- Unbolt and remove the back bottom crossmember. Your Squat Stand is now disassembled.
- Place four reinforcement plates at the back of the flat foot bars— two on each bar, facing each other. Loosely bolt them in place.
- Add back uprights between stabilizers and hand bolt in place. Make sure the BOS logo is facing outward.
- Check the placement with crossmembers, then add the remaining four reinforcement plates in alignment with the crossmember depth.
- Place the front uprights between the reinforcement plates and bolt in place.
- Place the upper back crossmember or secondary pull-up bar between the back uprights and bolt in place.
- Put the two side crossmembers on between the front and rear uprights and bolt in place.
- Bolt your pull-up bar on the front of your rack. You can also place it in the middle (this placement is great for a multi-grip), but the front is best for height and stability.
- Go back and tighten all of the bolts with a wrench and those sweet muscles you're working on or an impact gun.


