When you first look at a pair of gymnastic rings, they might seem like simple pieces of equipment, but mastering the right grip can be the difference between nailing a muscle-up or feeling like a flailing monkey.
Let’s dive into the three most important grips and when to use each for maximum gains. Ready to get a grip on your ring training?
The Three Grip Methods
Neutral Grip
The neutral grip is your go-to for exercises like pull-ups, rows, and dips. It’s pretty straightforward—just grab the rings so your palms face each other, thumbs wrapped around for stability. This grip is perfect for building foundational upper body strength because it allows for a comfortable, stable hold.
Think of the neutral grip as your default setting. Whether you're just starting or working on increasing reps, this grip keeps things steady and lets you focus on form rather than your hands slipping off mid-set.
Bonus: it's also the least likely to wreck your wrists, so you'll avoid unnecessary aches and pains.
False Grip
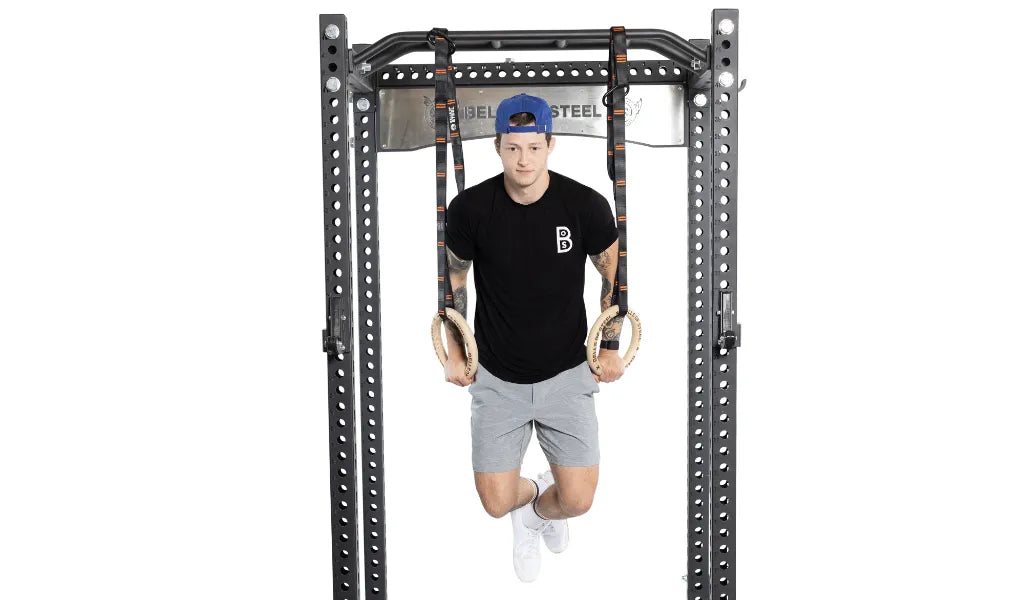
Ah, the false grip—both feared and loved in the world of rings. The false grip involves placing the base of your palm over the ring while your wrist rests directly on top. Your hands won’t be fully wrapped around the rings, and let me tell you, it can be tough to hold. But if muscle-ups are on your to-do list, this grip is non-negotiable.
The false grip is perfect for exercises that require transitioning from a pulling to a pushing movement, like muscle-ups. While tricky to master, it’s the only grip that lets you smoothly get from a pull-up position to above the rings. Just be prepared for your wrists to feel the burn!
Overhand Grip
For movements that involve more complex body control—like levers, swings, or hanging exercises—the overhand grip is your friend. Here, your palms face forward, similar to gripping a pull-up bar. It’s essential for stabilizing the rings when you’re performing moves that require more dynamic motion or hanging at odd angles.
It’s also a great grip to challenge your grip strength, as hanging for extended periods can be taxing on your forearms. If you’re working on skills like L-sits or front levers, the overhand grip allows you to maintain better control over the rings as they twist and shift with your movements.
When to Switch It Up
So, how do you know when to use each grip? Well, it depends on the exercise and your goals:
- Neutral grip: Use this for strength-building exercises like pull-ups, rows, and dips. It’s versatile and easier on your joints.
- False grip: This is for your advanced moves like muscle-ups. If your goal is to smoothly transition from pulling to pushing, false grip is the way to go.
- Overhand grip: Best for more dynamic or hanging exercises. Use it for front levers, L-sits, or swings.
You can also experiment with different grips in your workouts to increase the challenge. For example, starting with a neutral grip and then progressing to a false grip as you build strength can keep your routine fresh.
Tips for Gripping Like a Pro
- Chalk it up: Rings can get slippery, and you don’t want to lose your grip in the middle of a rep. Chalk is your best friend here.
- Strengthen your wrists: Gripping can be tough on your wrists, especially with the false grip. Incorporate wrist mobility exercises to prevent strains and injuries.
- Focus on form: Don't rush into the false grip without practice. Start with the neutral grip, work on your control, and gradually shift to more challenging grips.
Final Thoughts
Mastering the various grips on gymnastic rings is essential for making the most out of your training. Whether you're focusing on foundational strength with the neutral grip, advancing to muscle-ups with the false grip, or controlling dynamic movements with the overhand grip, each one plays a crucial role in your fitness journey.
So, next time you're hanging around, experiment with different grips and see how they change your workout!